How to Tile a Wall: Step by Step
Tiling a wall can transform a plain surface into a stunning focal point, adding both aesthetic appeal and functional durability to your space. Whether you're refreshing a kitchen backsplash, updating a bathroom, or giving a fresh look to any room, mastering the art of wall tiling can be a rewarding and cost-effective DIY project.
In This Article
In this step-by-step guide, we’ll walk you through everything you need to know to achieve professional-quality results, even if you're a beginner. From selecting the right materials and tools to prepping your wall and applying the finishing touches, we’ll cover each stage in detail, ensuring you have the confidence and knowledge to tackle your tiling project with ease.
So, roll up your sleeves, grab your trowel, and let’s get started on creating a beautifully tiled wall that you can be proud of for years to come.
Tools You'll Need
- Gloves
- Sponges
- Buckets
- Mixing drill
- Notched trowel
- Tile cutter
- Level
- Tile spacers and wedge spacers
- Measuring tape
- Marking tool
- Drill
- Box knife
- Clean microfiber rags
- Hole saw
- Grout float
- Margin trowel
- Grout brush or toothbrush
- Utility pick
01
Prepare Surrounding Areas

If there are any plumbing fixtures (like faucets) or hanging lighting on or in front of the wall you are tiling, you’ll want to remove those before betting started.
If you feel uncomfortable in any way removing plumbing or lighting, hire a licensed contractor to handle these tasks.
Next, cover up any areas that might get damaged during the installation process. Tiling is a messy project, and you will be bound to drop things on the surrounding surfaces.
Cover your countertops with construction paper (available at your local hardware store) and painter’s tape and protect any exposed flooring with a tarp. Even if you have unfinished floors, it is best to keep the area as clean as possible to cut down on prep time for any flooring projects in the future.
02
Prepare Your Walls
A tile installation is only as strong as what it’s bonded to. Making sure your drywall is in good condition and the paint is not peeling will ensure a lasting installation.
If tiling a wall that is not in a “wet area” (such as a shower), it’s perfectly acceptable to tile over painted drywall so long as the walls are in good condition. If you have any loose or flaking paint, you will need to address those first before getting started by scraping off any loose paint with a paint scraper. Finally, wipe down walls with a lightly damp sponge to pick up any dirt, dust or debris, as these can act as bond breakers which essentially causes thinset not to adhere to the surface properly.
If you are tiling over fresh drywall, be sure to tape and float the seams and apply a tile bonding primer before getting started.
03
Plan Your Tile Layout
To plan your layout for tiling a wall, you will need to select your spacer size, determine what focal points you have in your specific space, and maybe hang a ledger board depending on the location you are tiling.
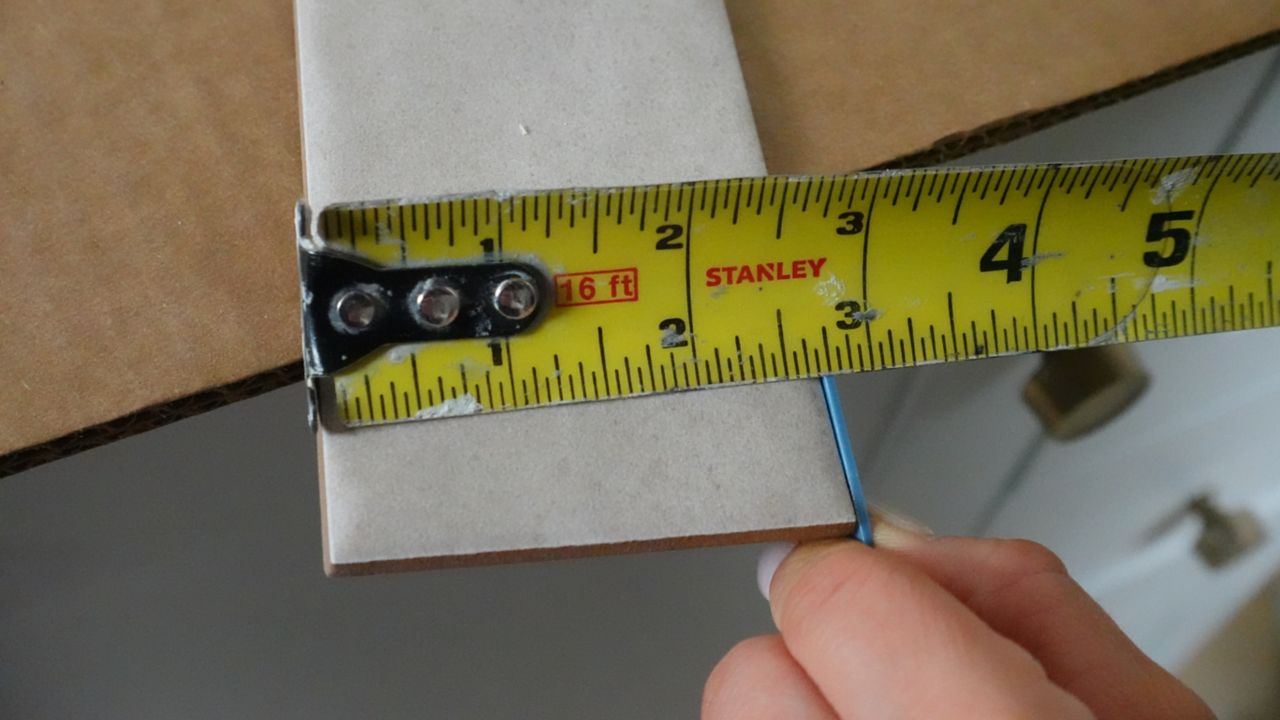
Select Your Spacer Size
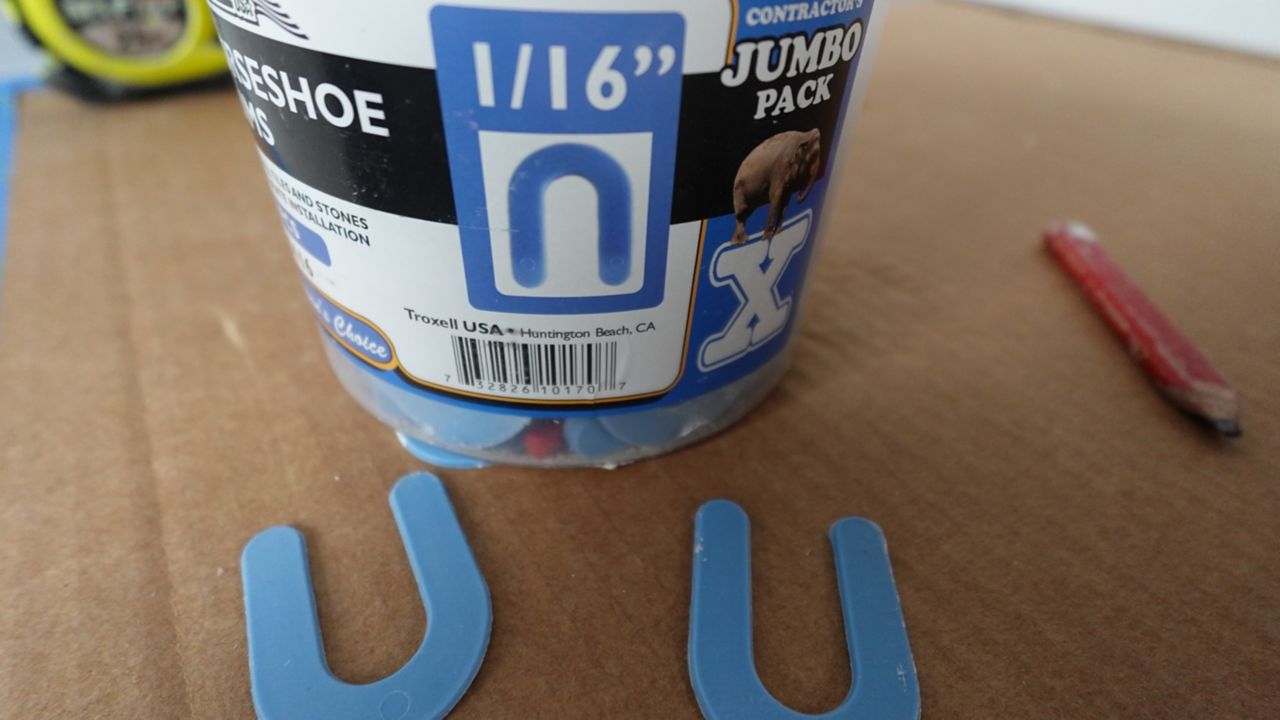
Before you decide on your tile layout, you will need to choose a spacer size. Some tile manufacturers will indicate which size of tile spacer they recommend. Always check for this, as some tiles can have slight variations in size, and using spacers that are too small can result in uneven installation.
Find Your Focal Point
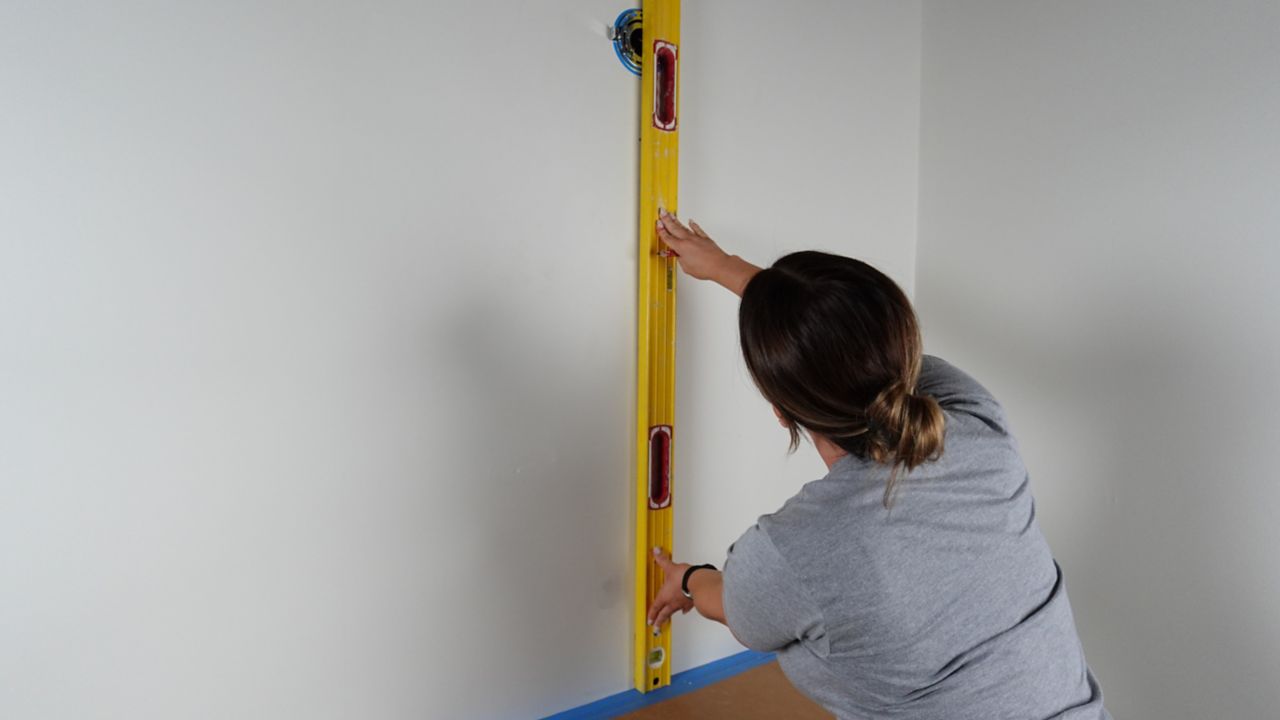
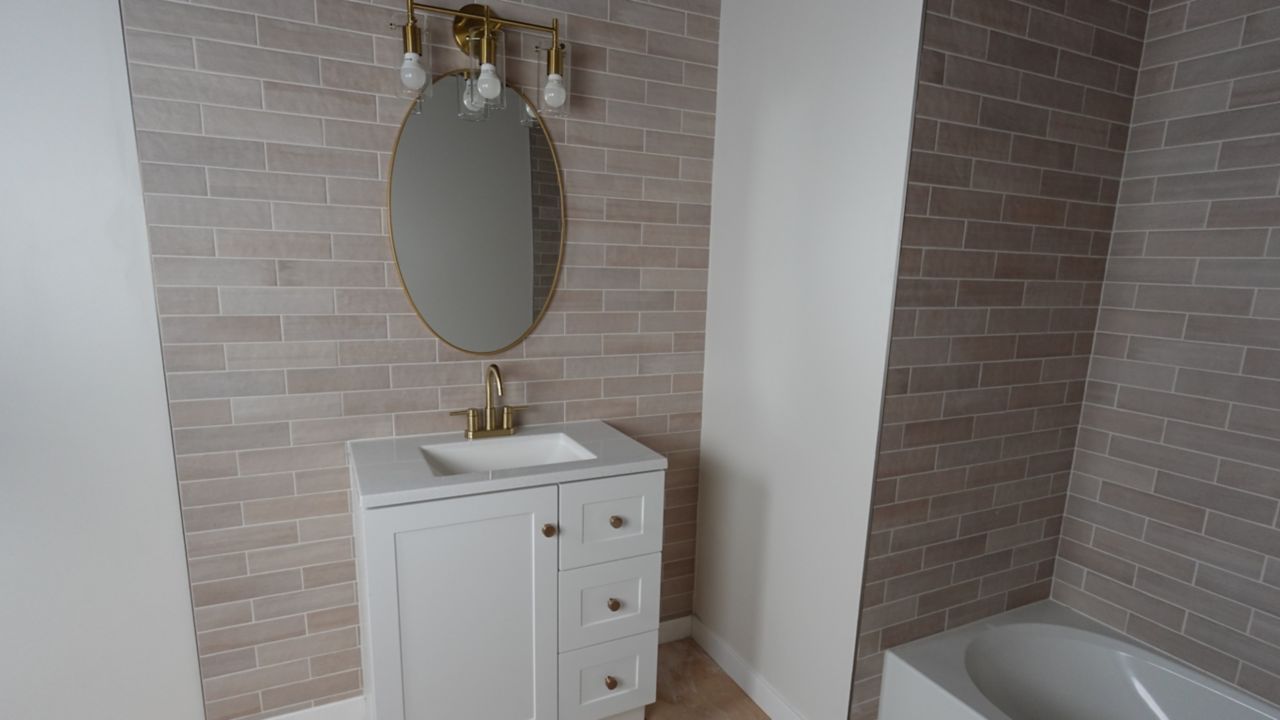
Next, start looking at the space to determine what your focal point or center will be. For example, if tiling a backsplash, sometimes it will look best to center the layout over the stove, sink or another focal point in the room. On a feature wall or vanity backsplash, you can just measure to mark the center point in the wall and create a center line using a level.
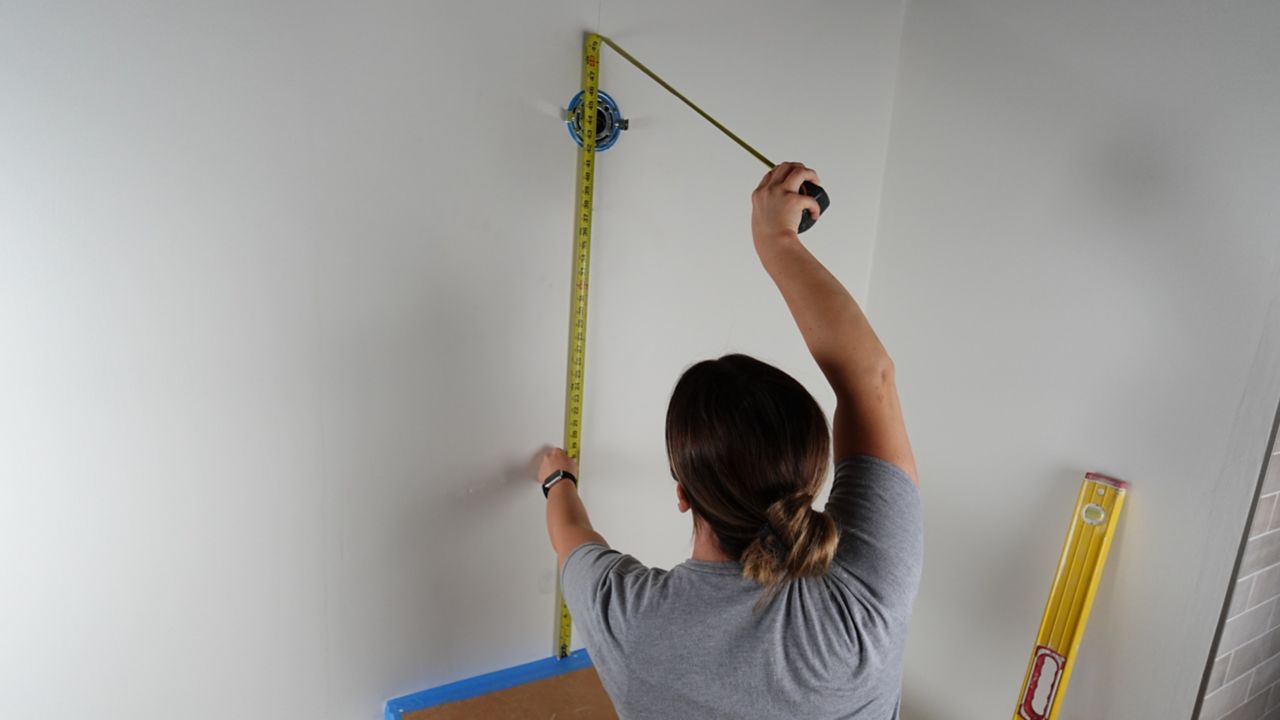
For the horizontal layout (how many tiles will run left to right), measure your space and divide that by the width of your tile plus one spacer. (For instance, if your tiles are 6” wide and spacers are 1/16” wide, divide the width of your wall by 6 1/16”.)
For the vertical layout, start by measuring the height of the wall. Then note the height of your tile plus a spacer size and divide the wall size by that number to determine how many full tiles you will have running vertically on your installation.
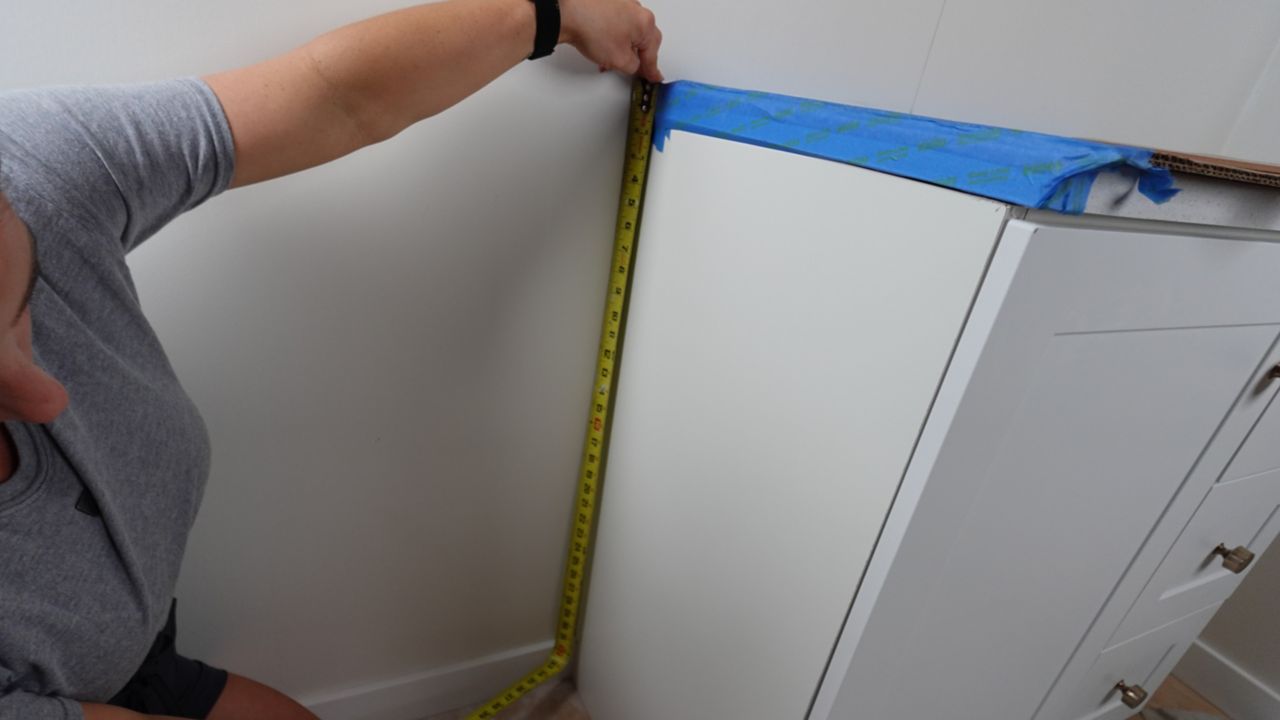
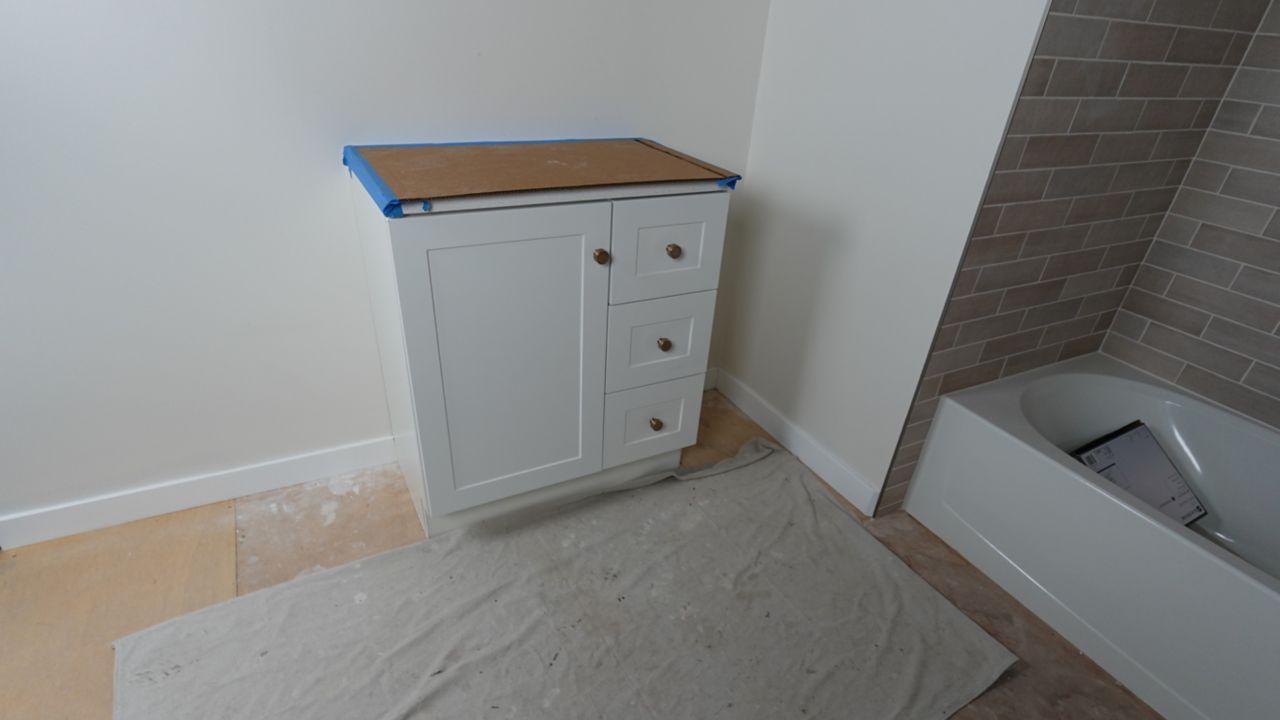
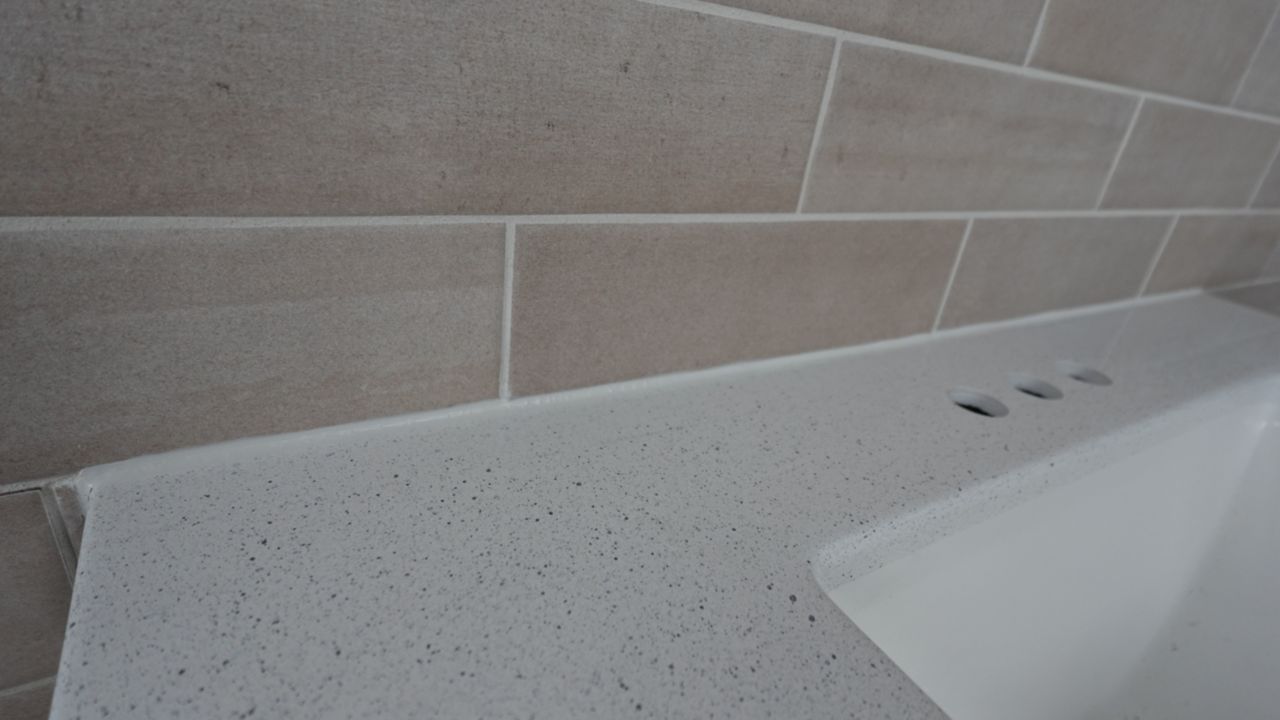
If you are tiling around a vanity, you will have to account for the counter height. Many people want to ensure that a row of full tiles runs across the vanity top/countertop. A simple way to do this is to first measure from the counter line up to the ceiling, beginning your layout with a row of full tiles. Then, you can measure between the counter line and the floor or baseboard, treating the lower portion of the wall as an area separate from portion above the vanity. This will ensure full tiles running across your vanity top or countertop.
Hang a Ledger Board
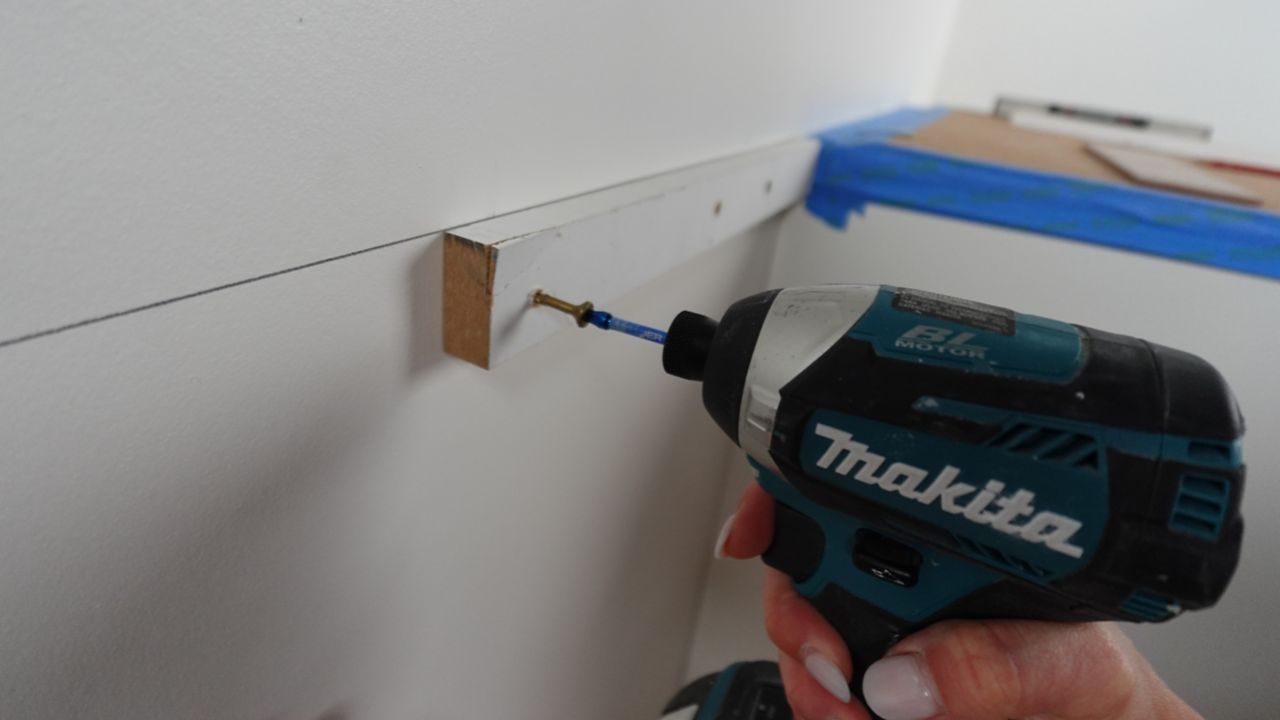
If you are planning to tile continuously above a countertop, like a kitchen backsplash, but will need to do so over open spaces where there is no counter (such as where your stove or dishwasher will go), hanging a ledger board is a great option.
A ledger board is a thin and sturdy piece of wood that will help ensure correct tile placement and support the weight of the tiles above while your thinset cures. You can even use 1x2 MDF boards from your local hardware store that have been cut down to size and screwed into the studs behind your wall.
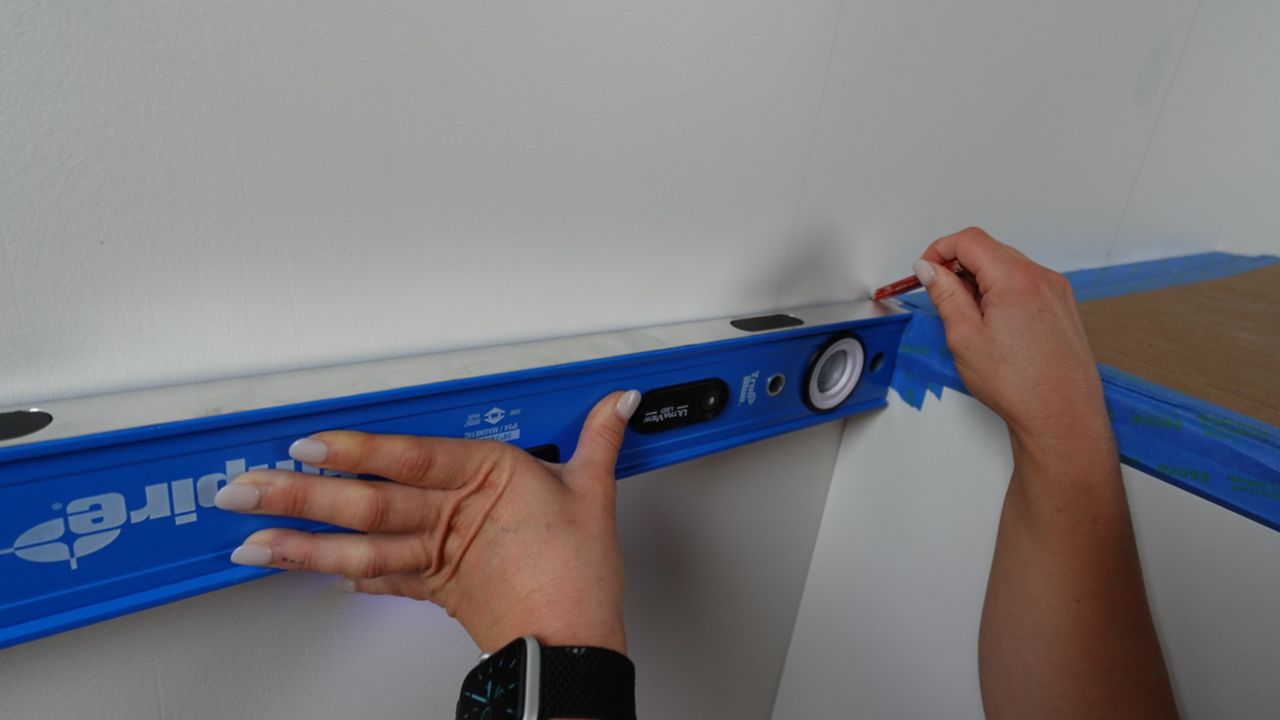
To hang a ledger board, locate the studs and mark where to place your screws. Next, use a level to draw out a line that is flush with your countertop. This will help you guide the placement of your ledger board.

04
Select the Proper Trowel Size
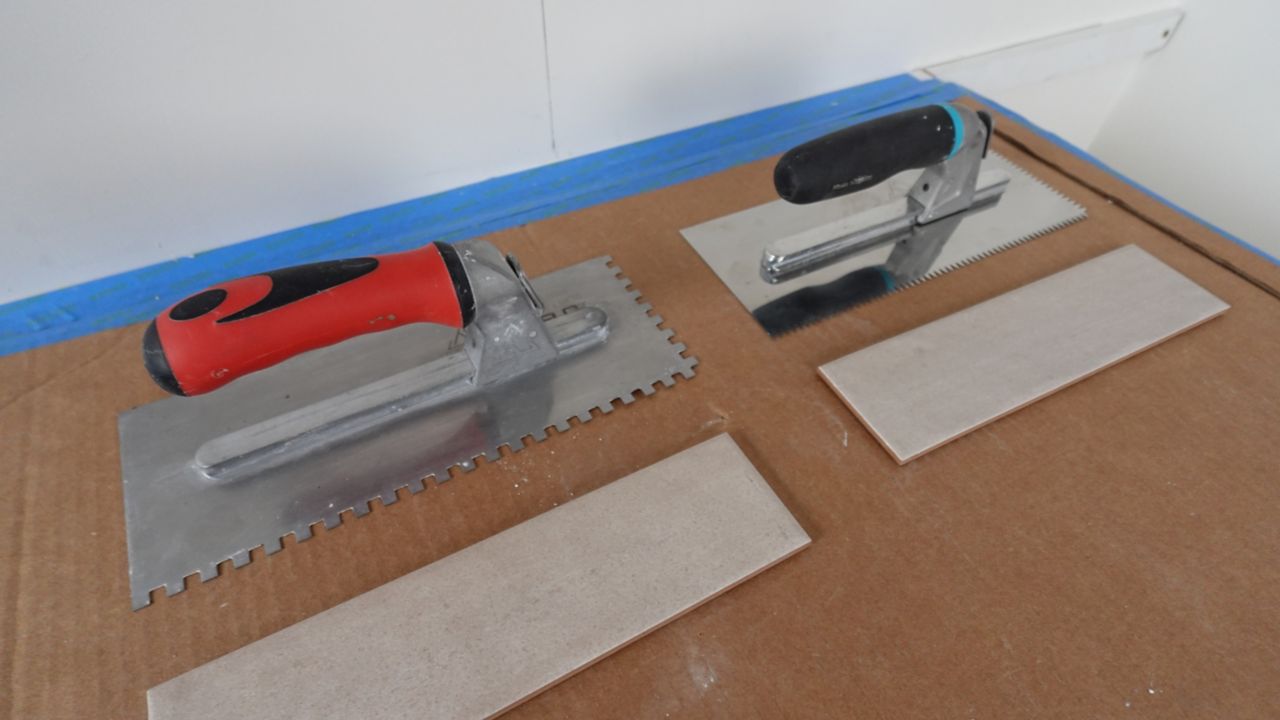
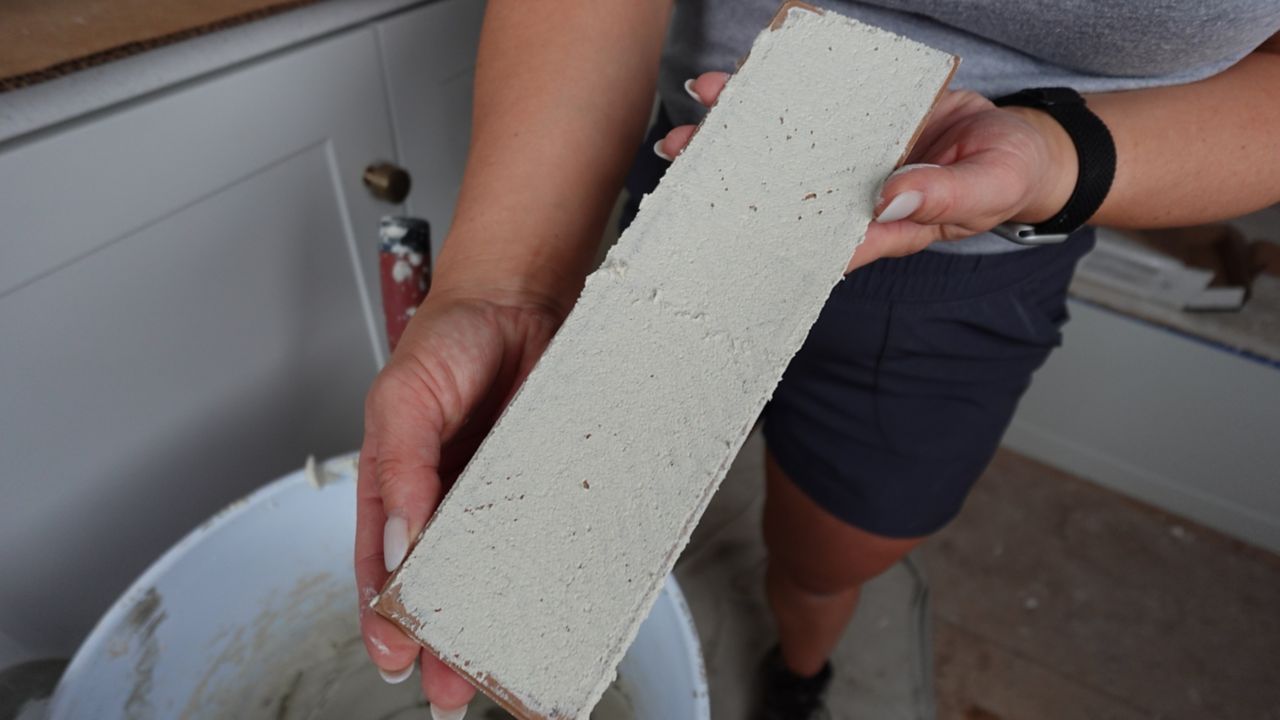
Choosing the right trowel size is important because depending on where you are tiling, you will need to obtain a certain amount of coverage. For example, the TCNA states that at least 80% coverage is required in a dry area so it is important we choose a trowel size that will help us achieve that in our installation.
Choose a trowel size based on the size of your tile. Here are some guidelines you can follow:
- Use a 3/16” x 1/4" V-notch trowel for mosaic tiles that come on a sheet
- Use a 1/4" x 1/4" square-notch trowel for tile sizes 4” to 8”
- Use a 1/4" x 3/8” square- or U-notch trowel for tile sizes 8” to 16”
- Use a 1/2" x 1/2" square- or U-notch trowel for tiles 16” and larger
05
Mix the Thinset Mortar
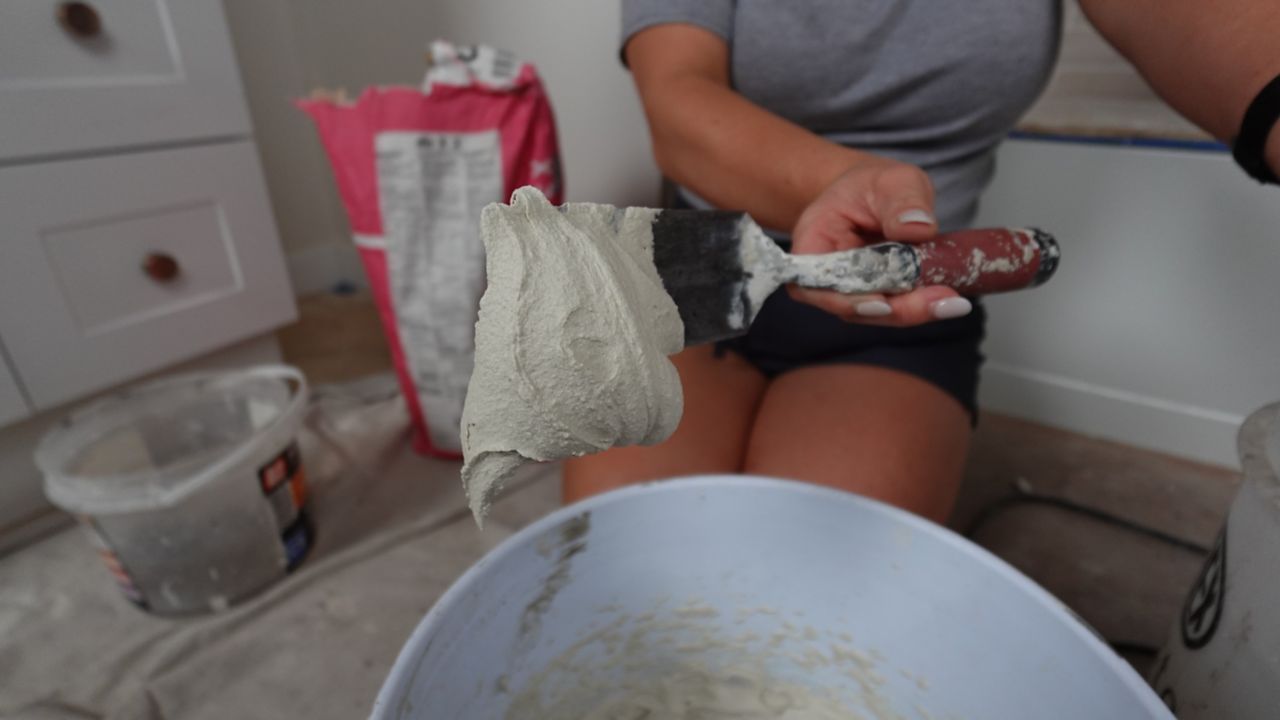
Following the manufacturer's instructions, mix your thinset mortar adhesive until it reaches the proper consistency and is free of any clumps of dry powder.
Tip: Only mix as much adhesive as you can use within 20 minutes. This will prevent the thinset from starting to cure inside your bucket.
Double-check the instructions on the package to see if your thinset requires a “slaking” period. Slaking is a word used for letting the mix rest (or “slake”) for a specified time before mixing it again. Not all thinsets will require this step.
06
Begin Laying Tile
Apply Thinset to Wall
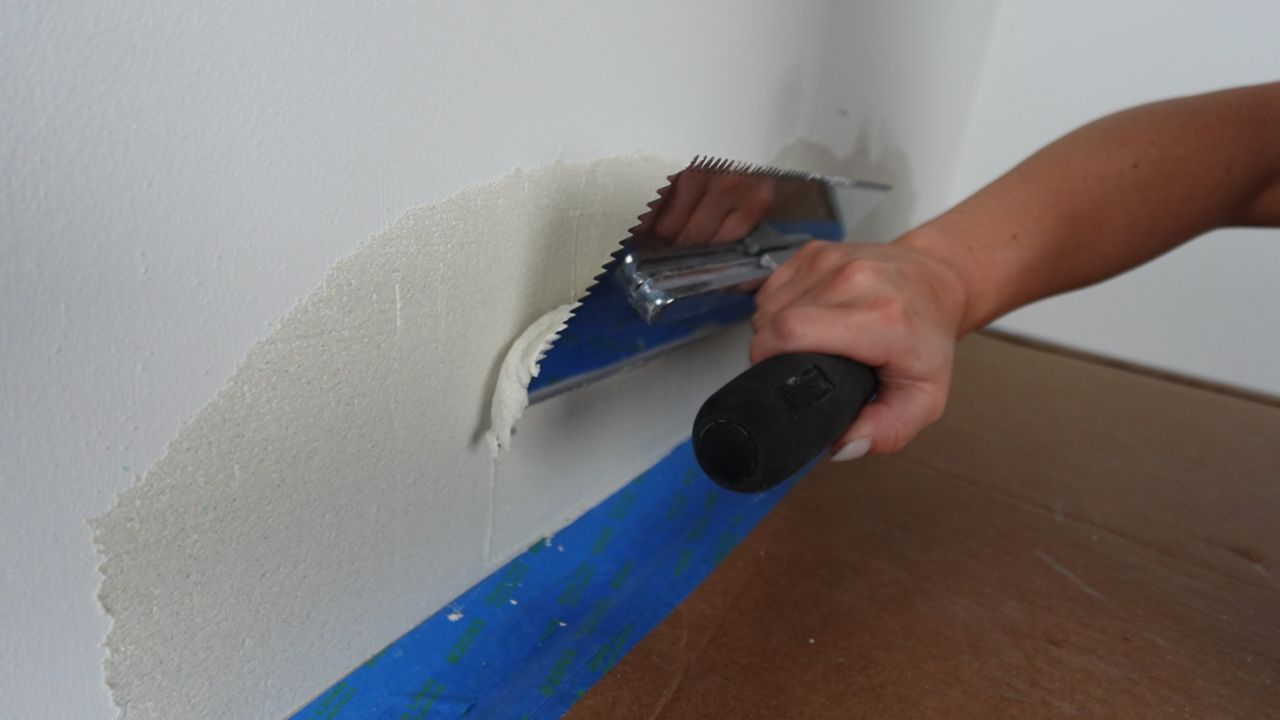
Using the flat side of your trowel, apply some mortar and scrape a thin layer of thinset along the wall where you will be setting the first row of tiles. Applying the first, thin layer of thinset is called “burning in.”
Next, apply more thinset mortar to the wall, this time using the notched side of the trowel to spread thinset. Run your notches all in the same direction, ideally parallel with the shortest side of your tiles. This will allow air to escape quickly for maximum adhesion when you apply the tiles.
Apply Thinset to Tiles
To get the best coverage of thinset and the strongest bonding tiles, use the flat side of your trowel to “burn in” a small amount of thinset to the back of each tile before installing it.
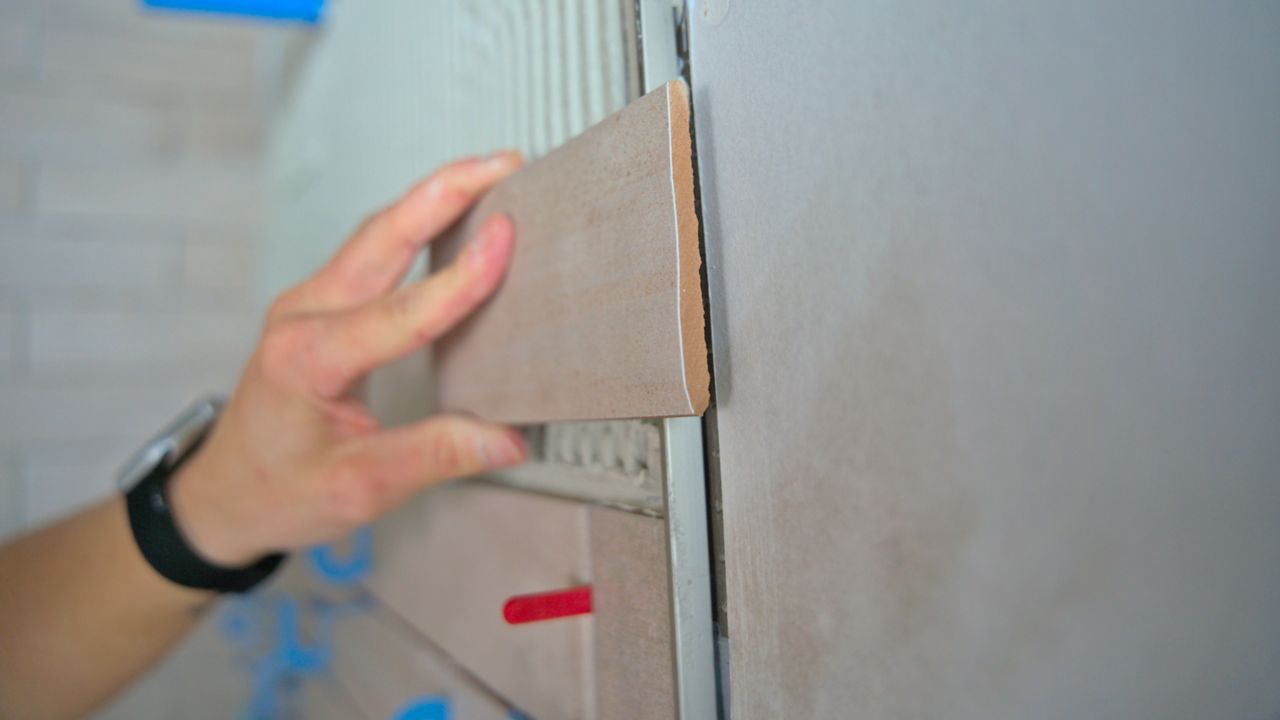
Adhere Tiles to Wall
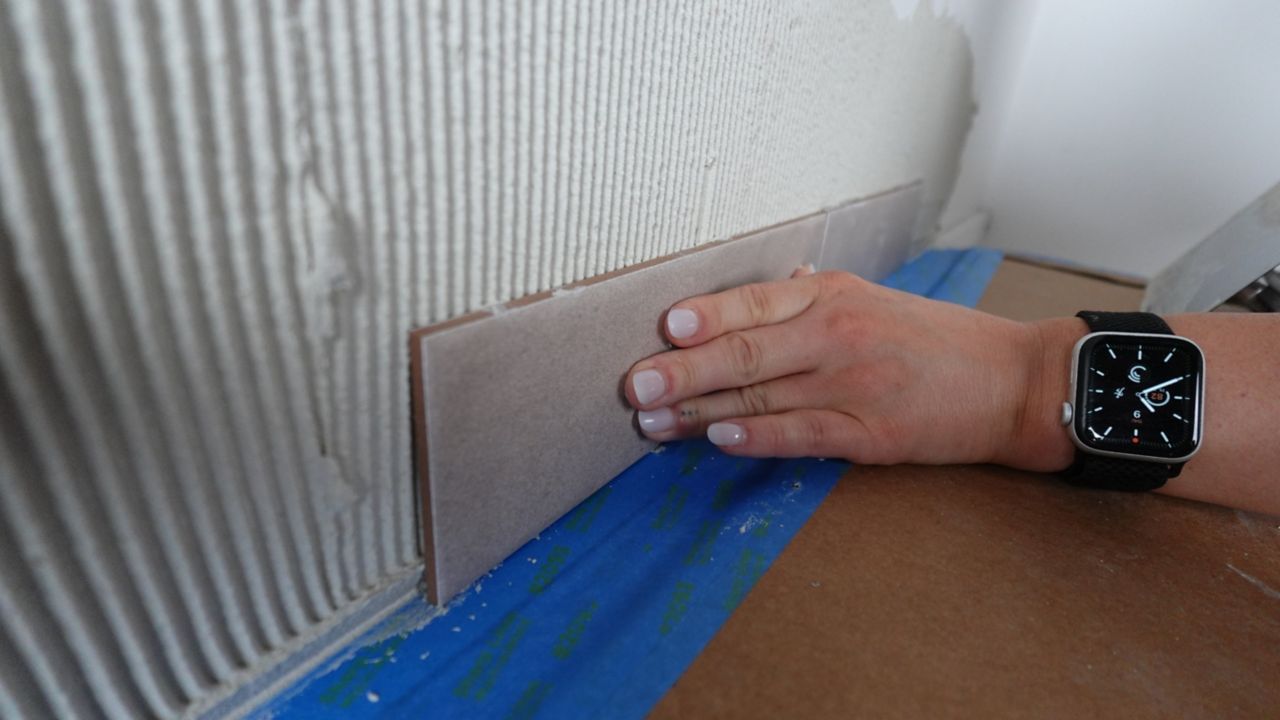
When it’s time to place your first wall tile, the best method is to press the tile firmly into place, moving it back and forth slightly in the opposite direction of your trowel lines. This motion helps collapse the ridges of thinset behind your tile, allowing air to escape.
Check for Coverage
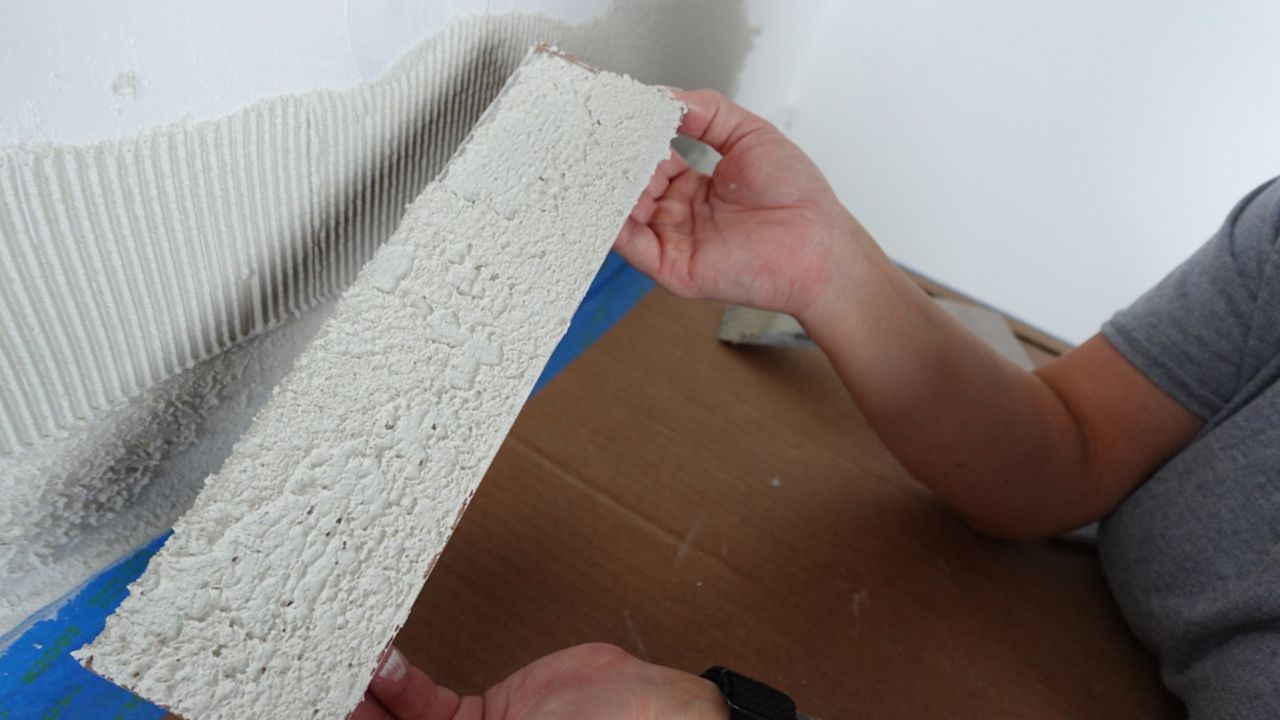
As you lay your first row of tiles, you will want to remove a tile to check if you are getting the proper amount of coverage on the back of the tiles. The TCNA states that it is required tiles in a dry area have a minimum of 80% coverage. If you are not getting the proper amount of coverage, go up to the next largest size of notch trowel and try again.
Ensure Rows are Level
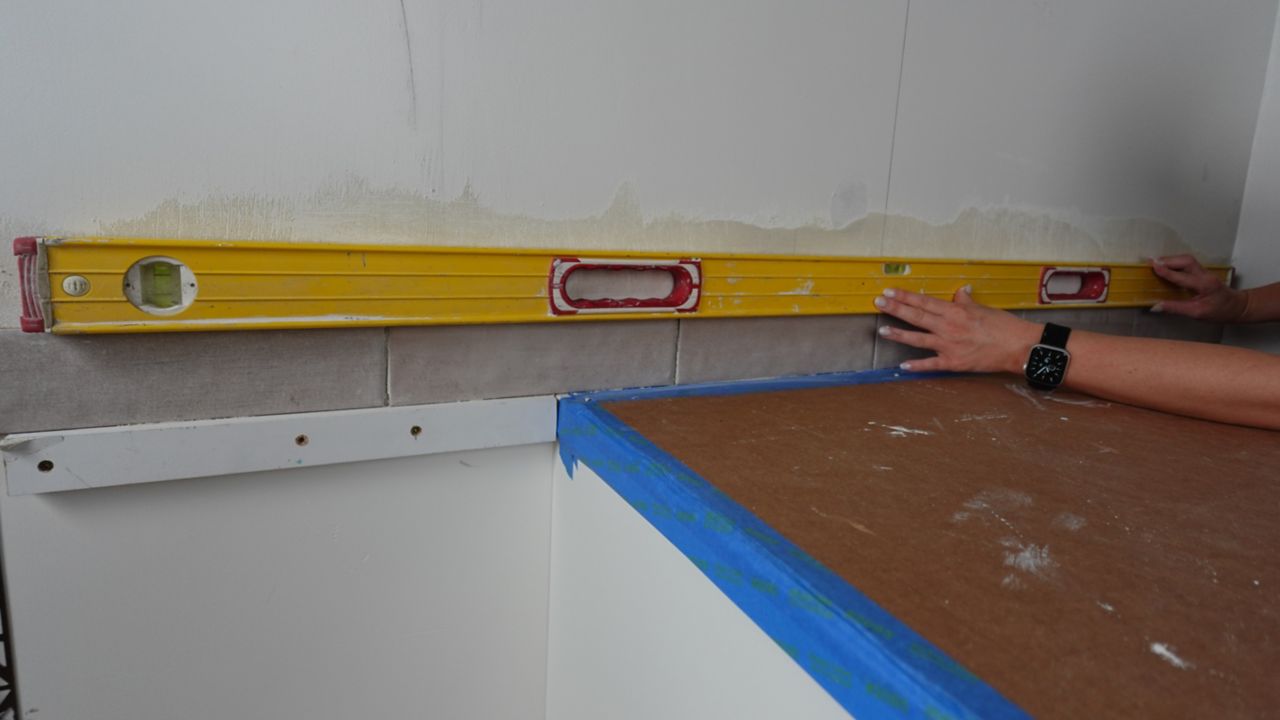
Throughout your installation, you will need to ensure that your tiles are level, both horizontally and vertically. When your first row is complete, use a level or straightedge to check your work before proceeding with the next row. Do this throughout your installation, checking every row (or every few rows) and making adjustments if needed.
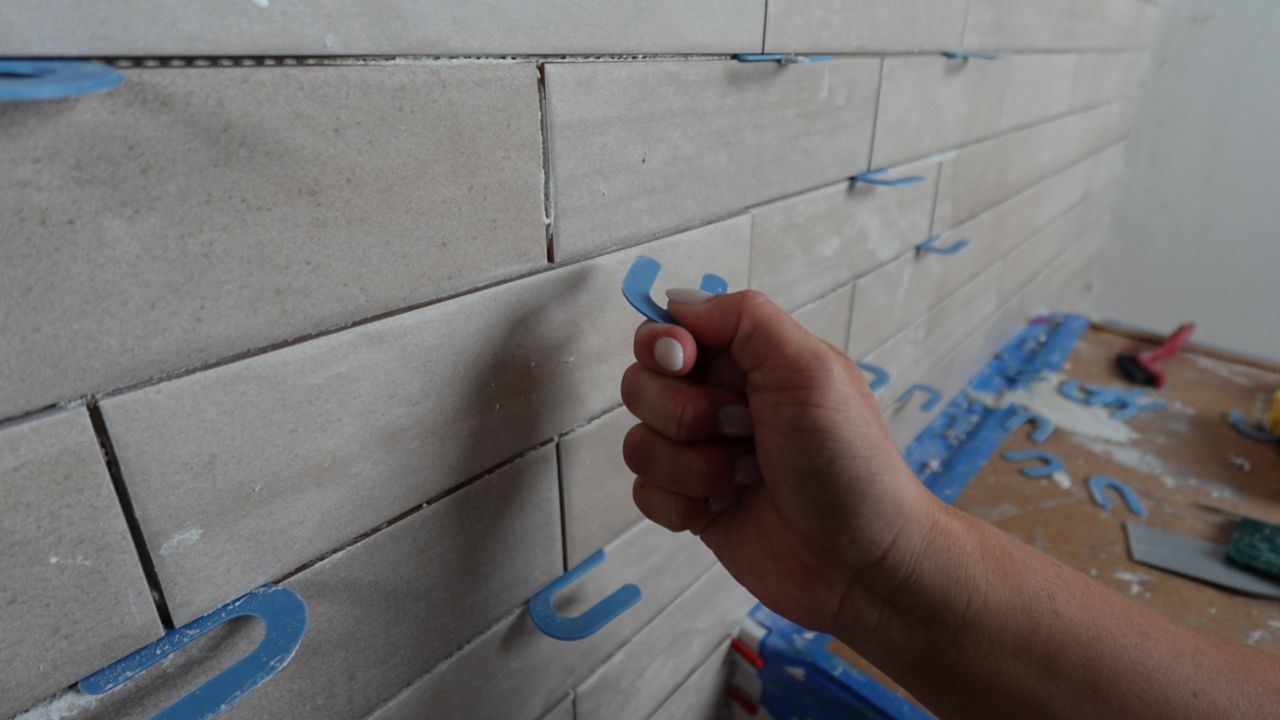
Add Spacers for Expansion
If tiling to a countertop, floor, or any adjacent surface, be sure to place spacers under your first row of tiles to allow room for expansion. It is required by ANSI that silicone be used at all changes of planes.
Clean Tiles as You Go
The longer thinset sits on the surface of your tile and in your grout joints, the harder it is to clean. Keep a grout brush or toothbrush, clean sponge, and pick nearby to clean your tiles periodically as you go. This will cut down on work later in your project as you prepare to grout.
You may remove your spacers temporarily to clean a few rows of tile at a time while you tile up the wall to make cleaning easier. Just be sure to remember to replace these spacers before proceeding.
Pro Tip: Cutting the Tile
At some point in your tile project, you will need to consider cutting your tiles. Three common tools for cutting tile are a wet saw, snap cutter and angle grinder.
Our tutorial on How to Cut Tile includes detailed instructions and helpful tips on each method. You can also find instructions for cutting various materials, which cutting methods are best for different tile types, and important safety tips to keep in mind during your project.
07
Finish Tile Edges
On walls, tile edges are present at locations where tile coverage ends, and the drywall begins. Not every project will have tile edges; if yours does not, you can skip this step.
There are three main options for finishing tile edges: Bullnose Tile, Pencil Trim and Metal Edging/Profiles.
Ultimately, the method you choose will depend on your personal design preferences. For more information, check out our tutorial on How to Finish Tile Edges.
08
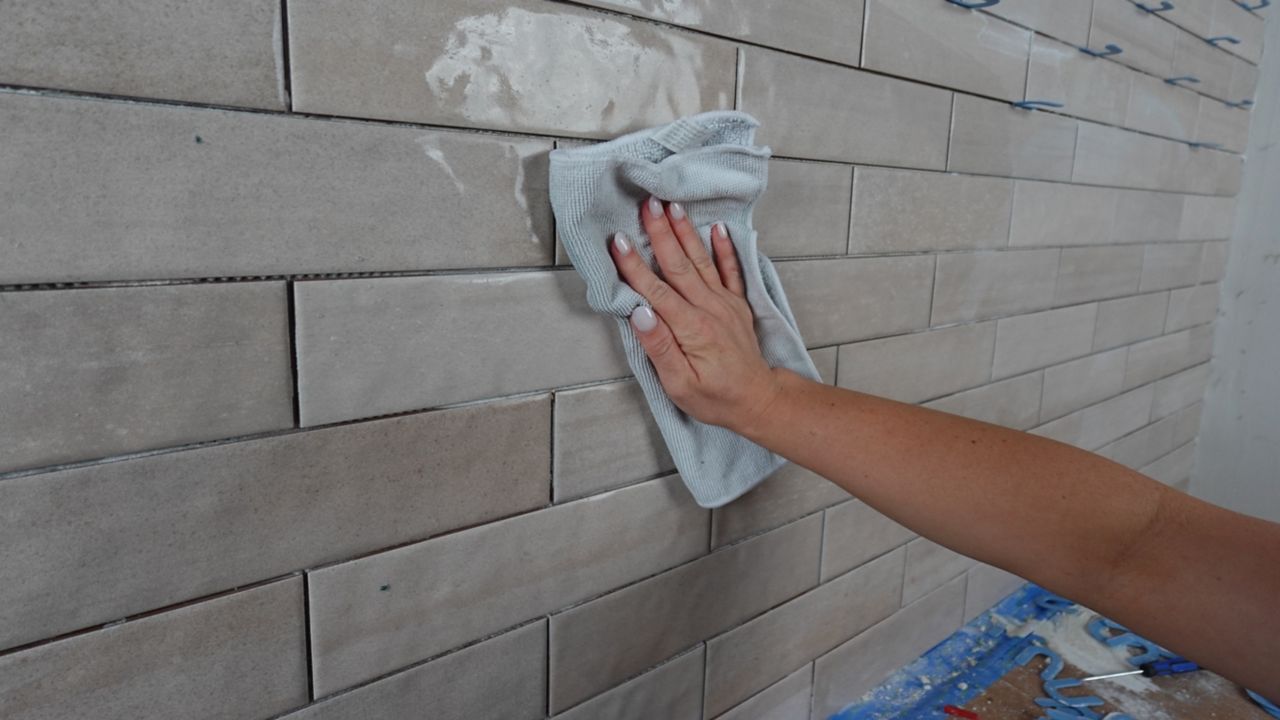
Cleaning the Tile Surfaces & Grout Joints
After you have allowed your thinset to cure according to manufacturer instructions, you will need to thoroughly clean the surfaces of your newly installed tiles, as well as the spaces left for grout joints, before you move on to grouting.
It is very important here to clean the tile and grout joints because any dirt left on the surface of your tile can lead to your grout color staining.
To clean your tiles before grouting, you’ll need:
- Two (2) clean buckets of water
- Clean sponges
- Dry microfiber rags
- Grout brush or toothbrush
- Pick or utility knife
- Scrubbing sponge
- Glass cleaner
Begin by removing all your tile spacers. If you see any areas where thinset may be sticking out of your grout joints, scrape it out with a grout brush or toothbrush.
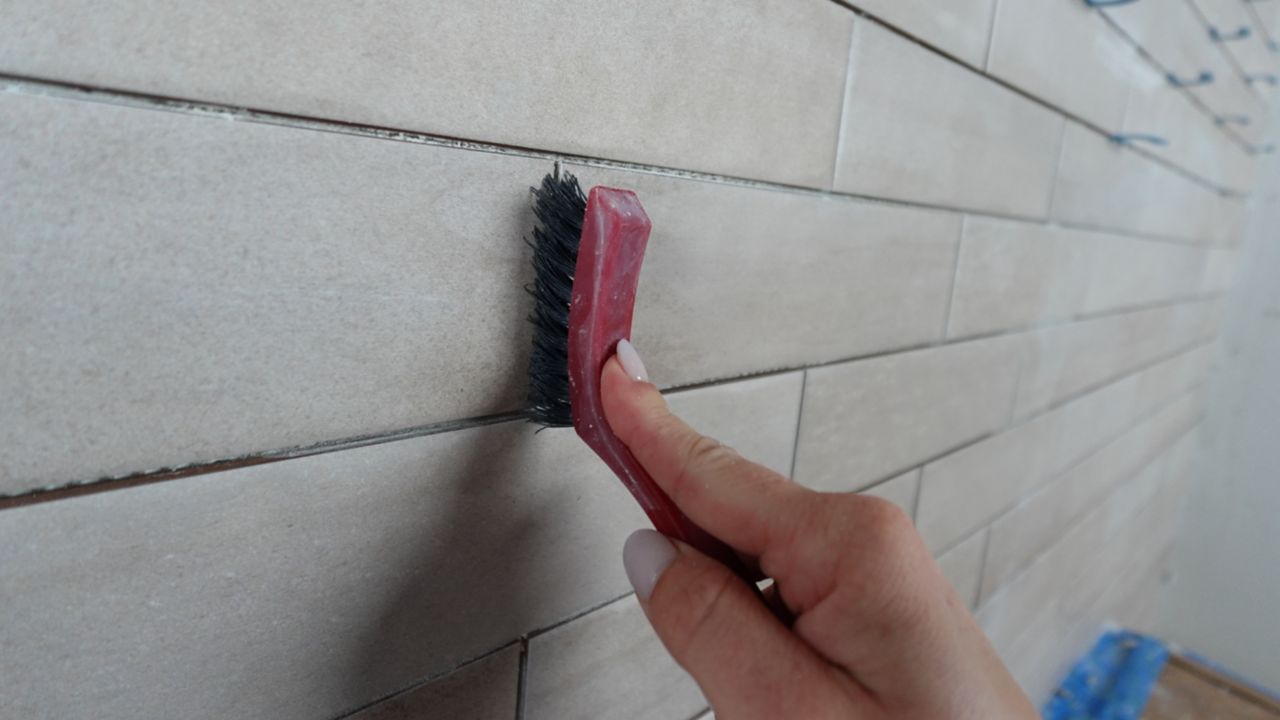
If grout is too dry, you may need to use your pick or utility knife for this step. Be careful, as these tools can chip tiles.
Next, begin scrubbing tiles with your green scrubbing sponge, followed by your soft sponge.
After you finish sponging the tile and it dries, you may notice a film still present on the surface of the tiles. To remove that film, use an ammonia-free glass cleaner and a clean, dry microfiber rag.
Once you are done cleaning, double-check that you have not missed any chunks of thinset in the grout joints, as these can protrude and hinder your grout from filling up a joint completely. Repeat the steps in this section as needed until grout joints are clear.
09
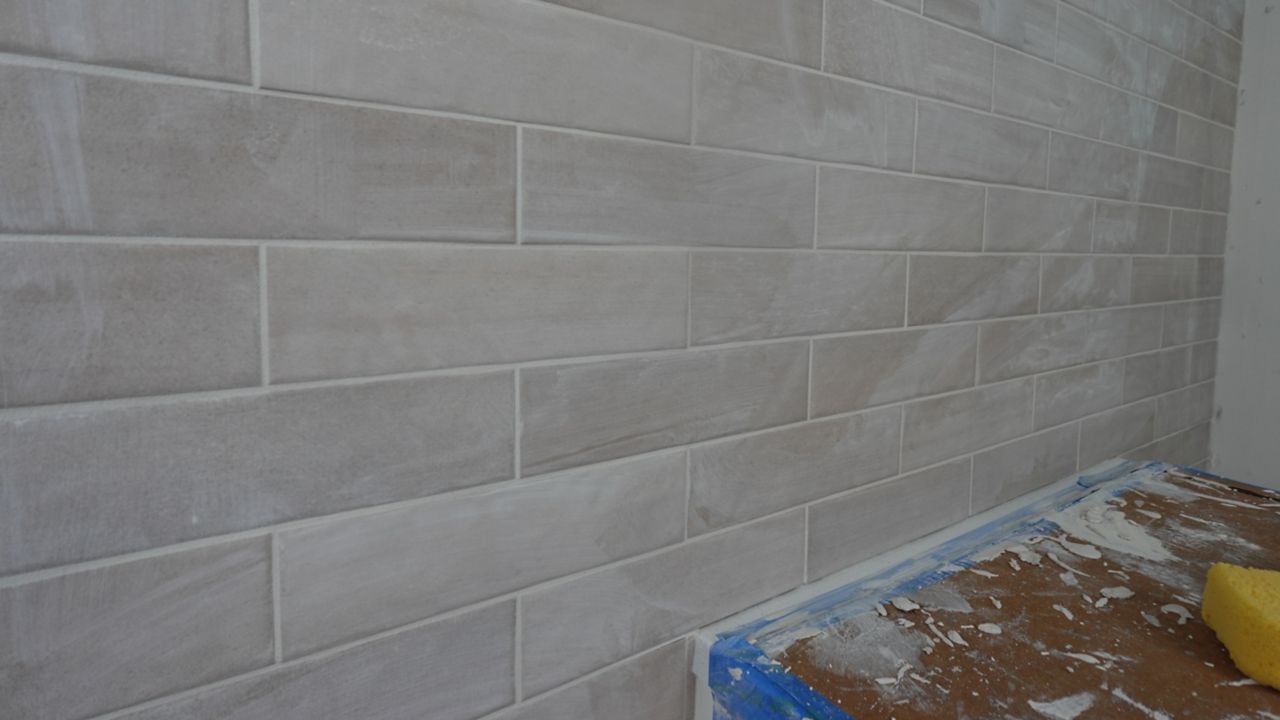
Grouting and Finishing
After you have finished cleaning your tile and checking for any built-up thinset left over from tiling, you are ready to grout.
Place some grout on your grout float using your margin trowel and begin applying grout to your tile walls using the short side of the grout float. Go back over the area with the long side of the grout float to fill up the grout joint and wipe the majority of the grout from the surface of your tile.

Continue with these steps for the entire wall. Be sure to pay attention to inside corners so that they don’t get filled with grout, as we need to leave this area clear for expansion.
Once your walls are grouted, let the grout dry for the specified time allotted by the grout of your choice. You can check if the grout is dry by touching it with your finger.
10
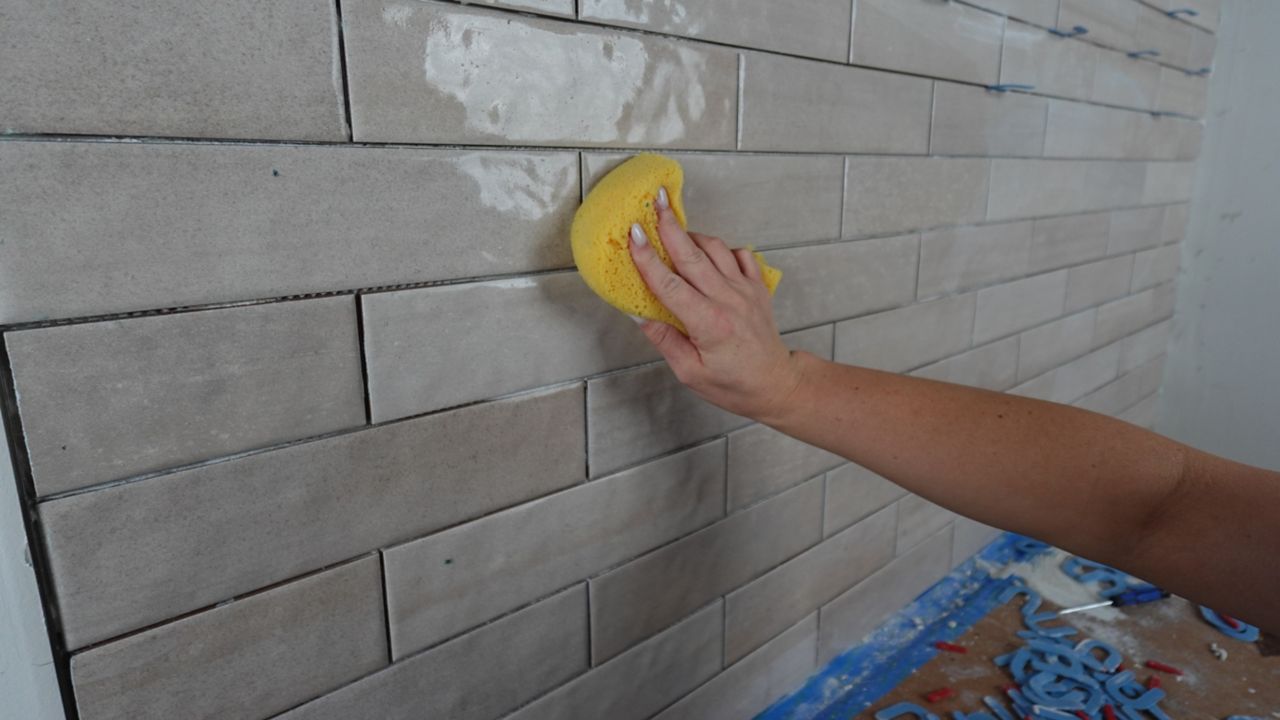
Cleaning Up
Once the grout is dry, use a clean, damp sponge to begin the process of cleaning the surface of your tile. Using circular motions, clean the surface of your tile, periodically flipping your sponge and rinsing it in clean water. Continue these steps until all the surface grout has been removed.
Once your initial clean is complete, your shower will end up with a sort of film on the surface. This film is called “grout haze.” To remove the grout haze, you’ll need two buckets of water, a clean sponge and a dry microfiber towel.
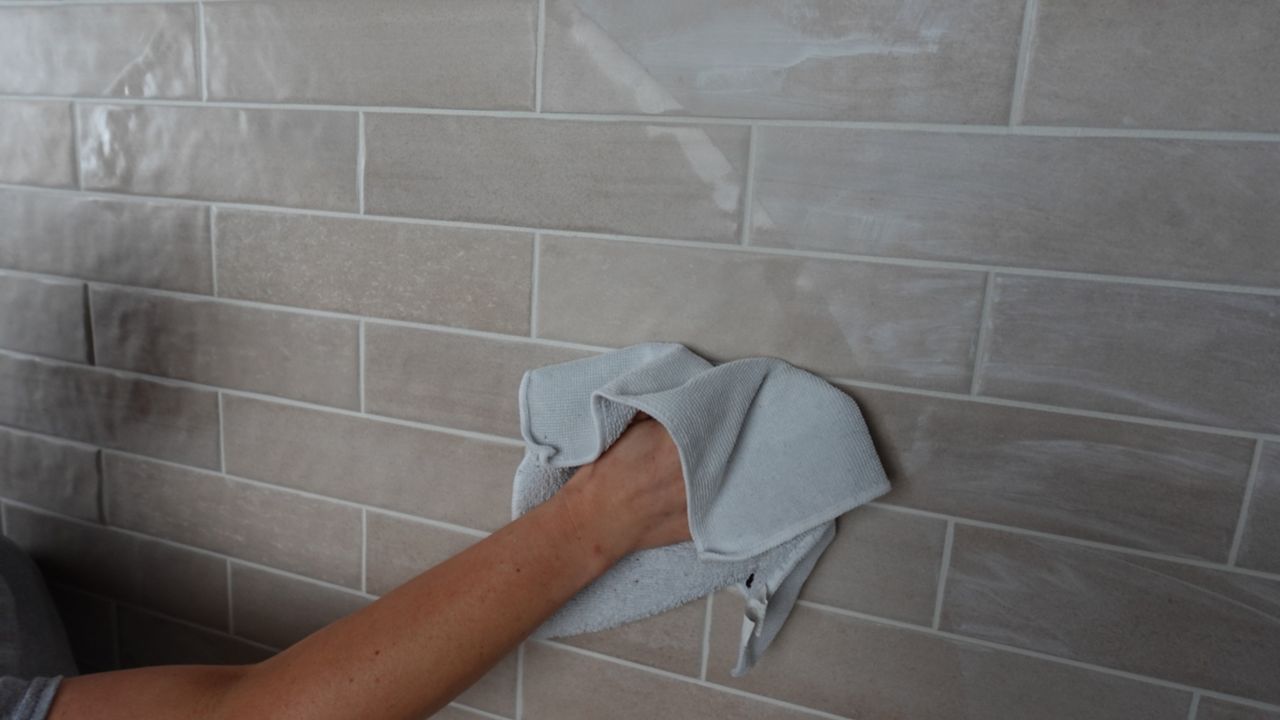
Begin cleaning by using a damp sponge on the surface of your tile. Follow up each section that you have sponged with a dry microfiber. Repeat until the entire wall is complete.
Once the tiles are cleaned and dry, you should be able to see if all grout haze has been removed. If you have stubborn grout haze, you can follow up with a grout haze remover.
Pro Tip: Quicker Cleanup
For the best results when removing grout haze from tiled walls, use one bucket for dirty water, and one for clean water. To keep the water in the second bucket clean, only wring out sponges over the dirty water bucket.
This ensures you are only applying clean water to walls, which significantly reduces the amount of time it takes to remove the grout haze.
11
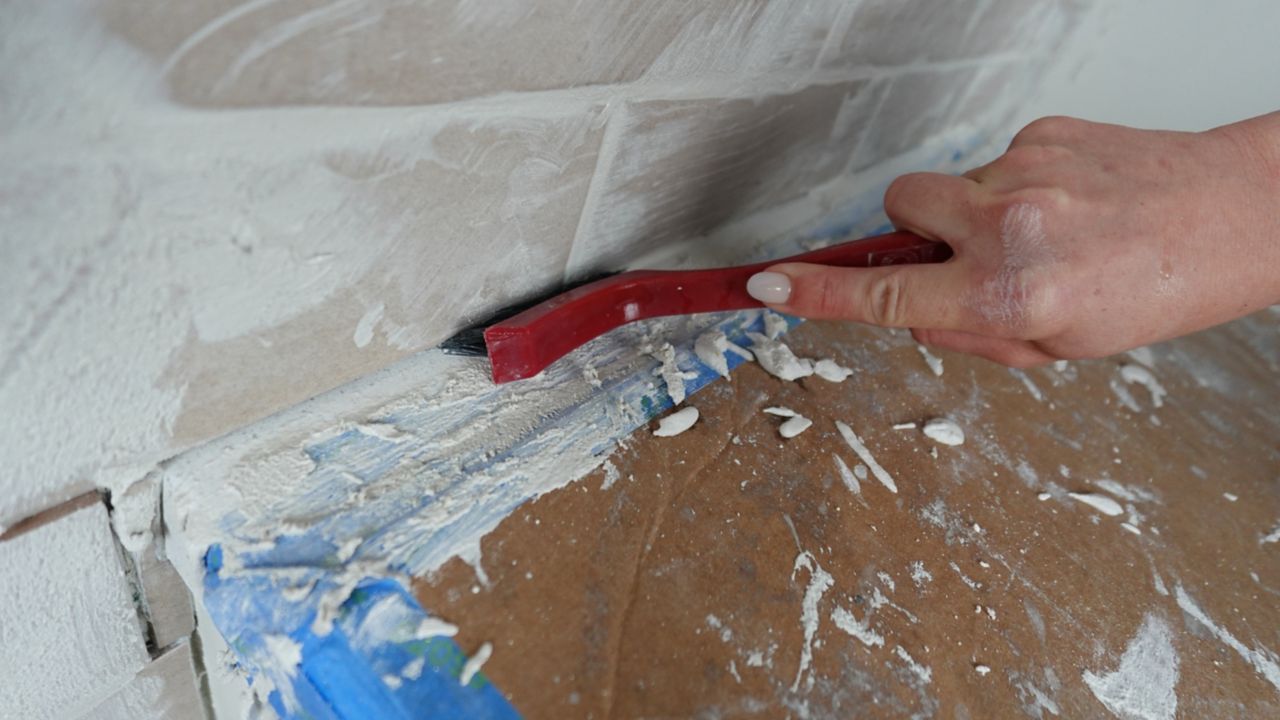
Apply Silicone
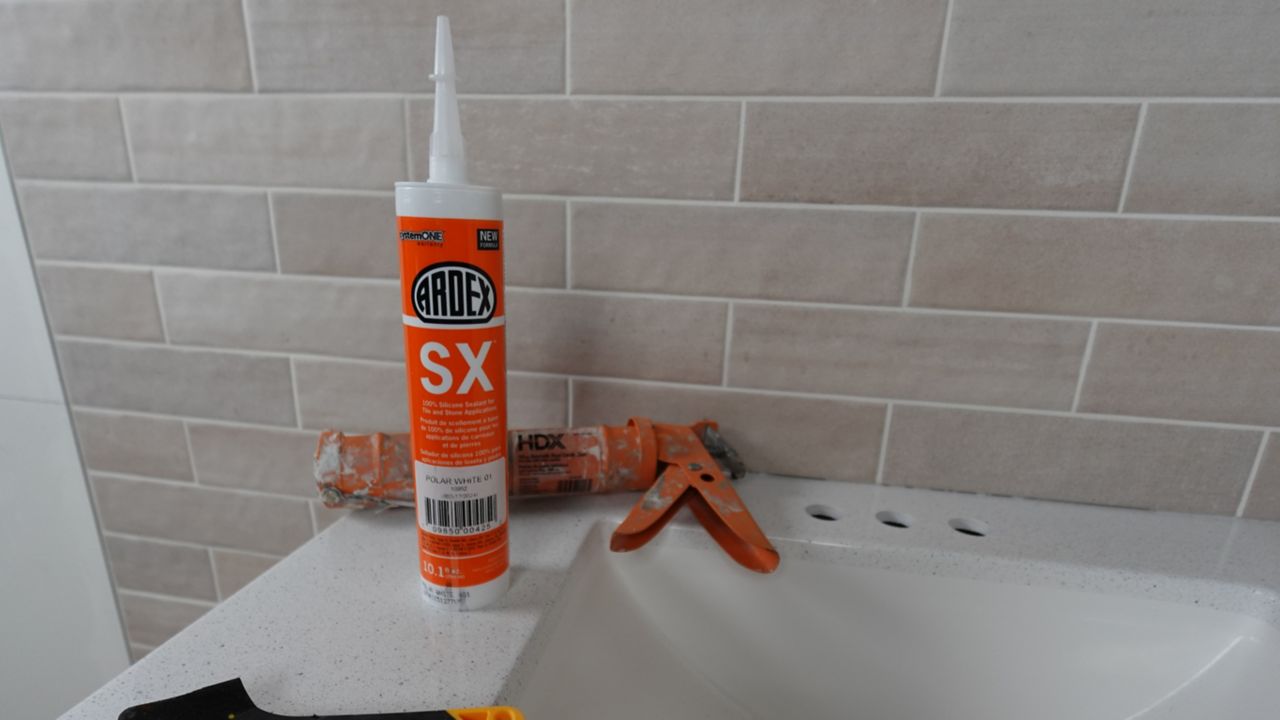
The final step in the process of tiling a wall is to apply silicone to seal the changes of planes for expansion. Here, we are using a grout-matching silicon caulk and placing it where the tiled walls meet the countertops and any other adjacent hard surfaces, like baseboards, cabinets or flooring.
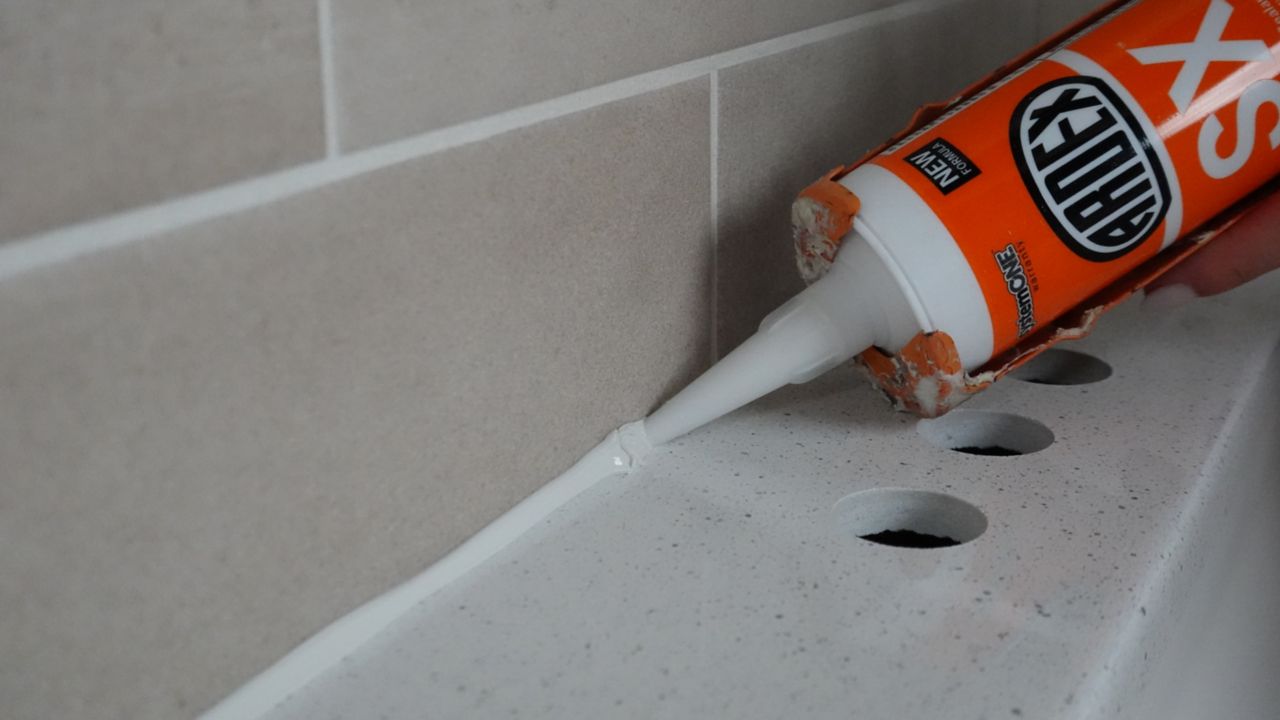
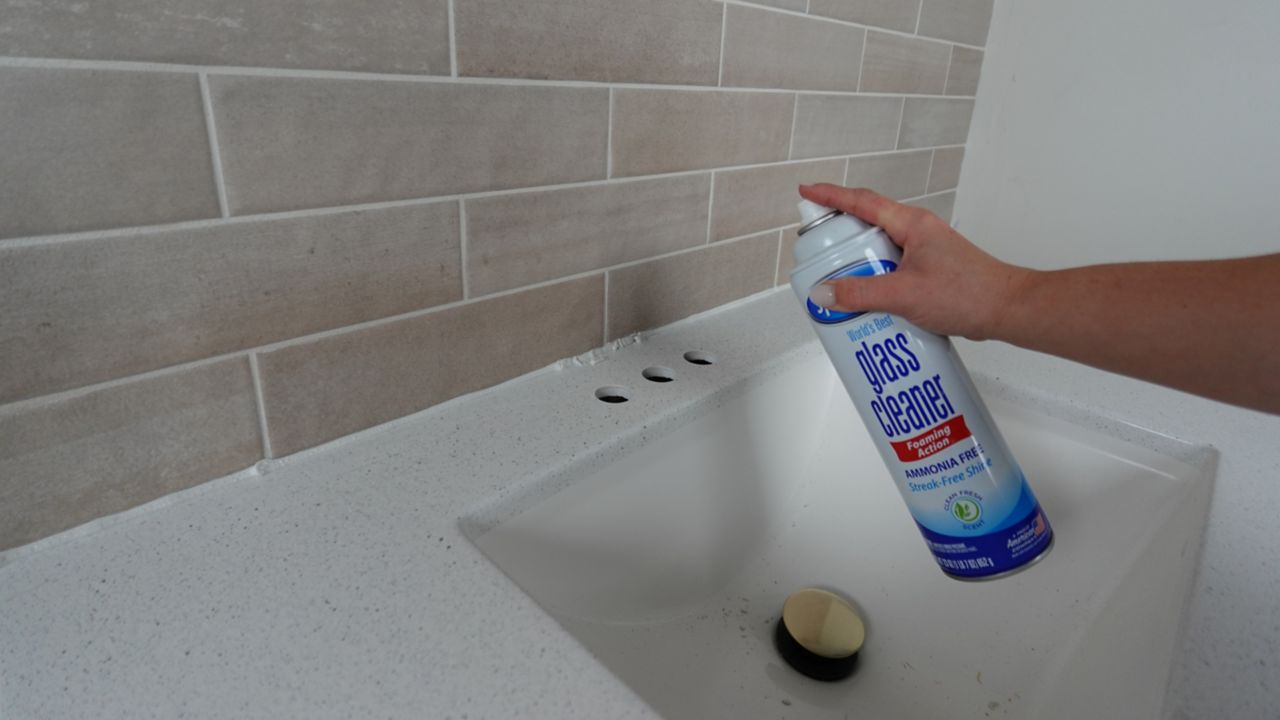
First, lay a generous bead of silicone. Next, spray ammonia-free glass cleaner on the bead. This helps to stop your silicone from sticking to the surfaces around the area you are working in.
The last step is to use a caulking tool to press the silicone into your joint and slowly remove any excess, being sure to wipe the tool often to avoid the silicone from spilling over on your countertop or adjacent surfaces.
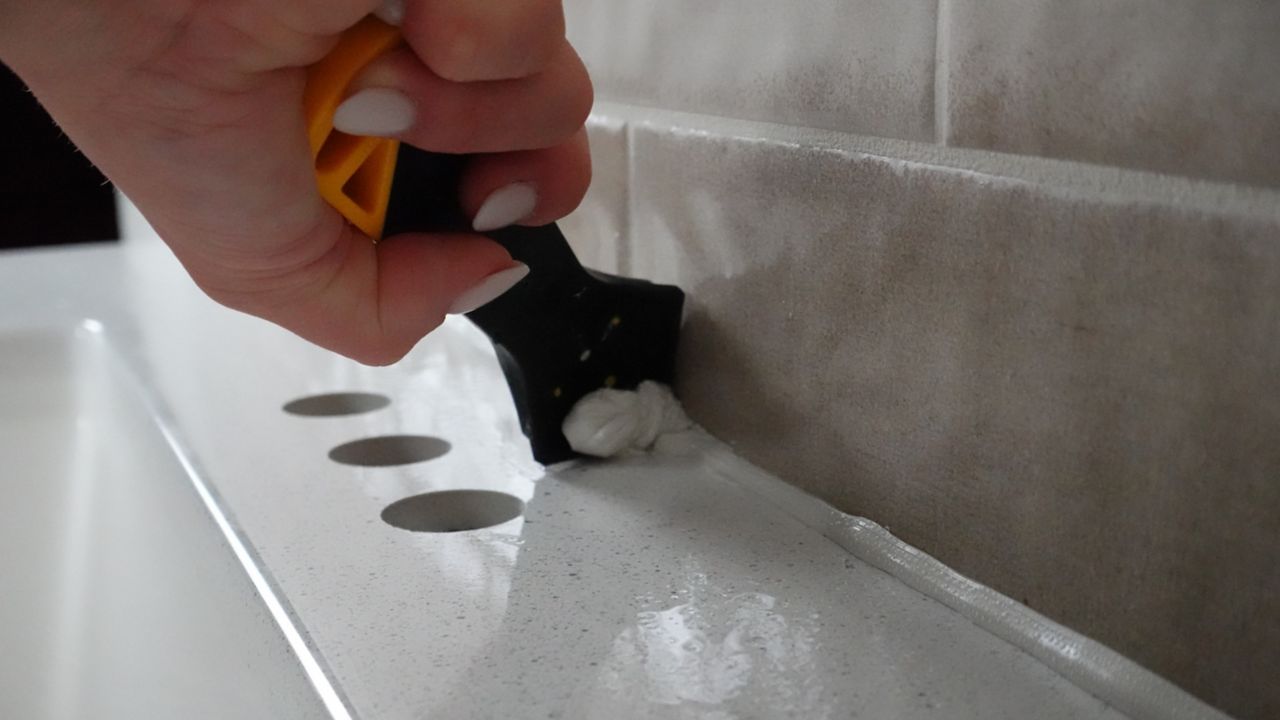
Allow the silicone to dry for at least 48 hours before installing fixtures or getting wet.
Installing Tile on a Wall - FAQs